Silver Drips

|
|
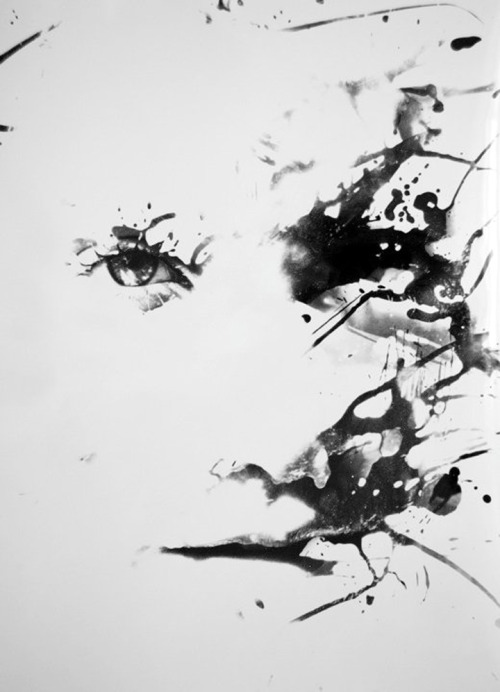
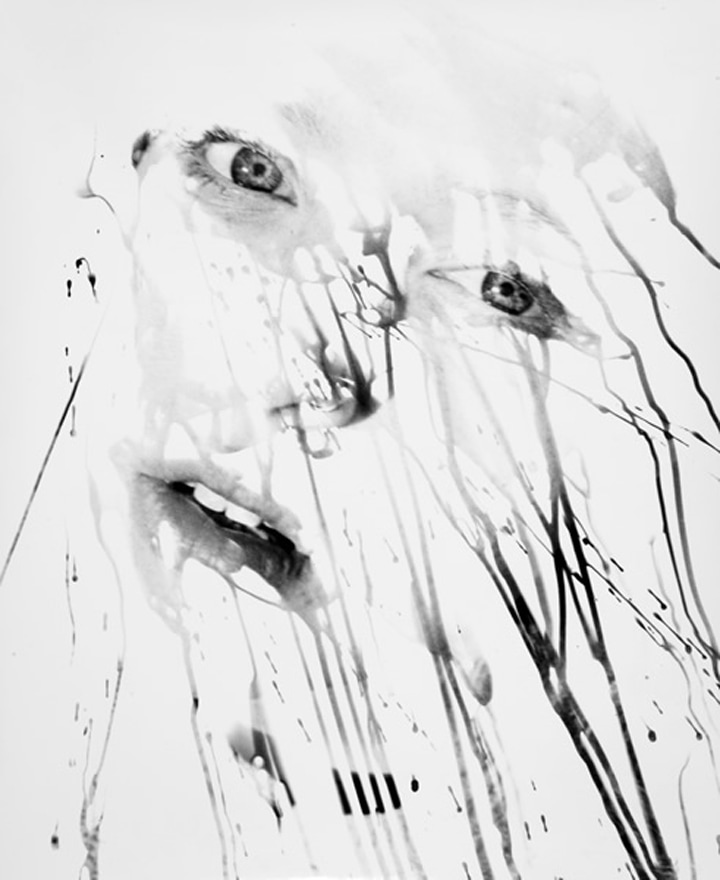
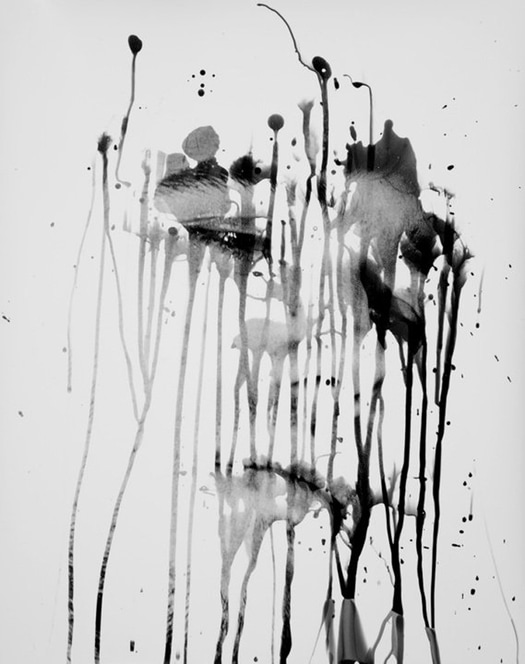
At first glance, photographer Timothy Pakron’s “Silver Print” series of portraits might look like ink paintings or some kind of CG art. They’re actually photographs created by hand painting developer onto photo paper in the darkroom instead of immersing the paper entirely in the solution. Pakron writes,
By using the familiarity of the face as the template, my process involves hand painting the developer in the darkroom, intentionally revealing specific, desired aspects of the face in the negative. Doing so creates a stark negative space that gives the portrait a lucidity. Instead of creating a realistic, straight from film portrait, I am more interested in exploring how the original image can be brought to the surface in alternative ways. The portraits embody their own unique strangeness.
|
|
Photo Assignment 4 (film) - Experimental Dark Room Assignment
|
Experiment with splashing, dripping and spraying developer on the prints and then letting the developer run down the paper in some prints. You could also paint developer on points of interest such as the eyes, nose and mouth. Different size brushes and other dropper tools will be available to do these techniques.
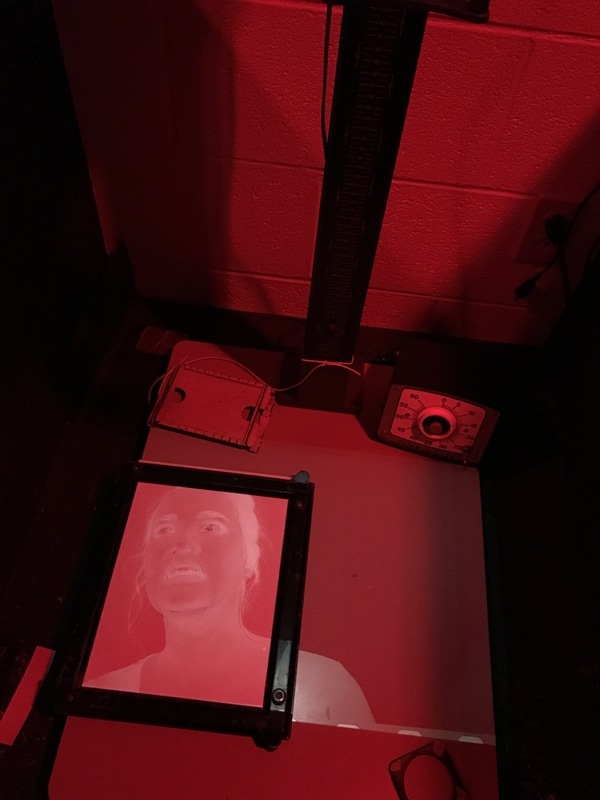
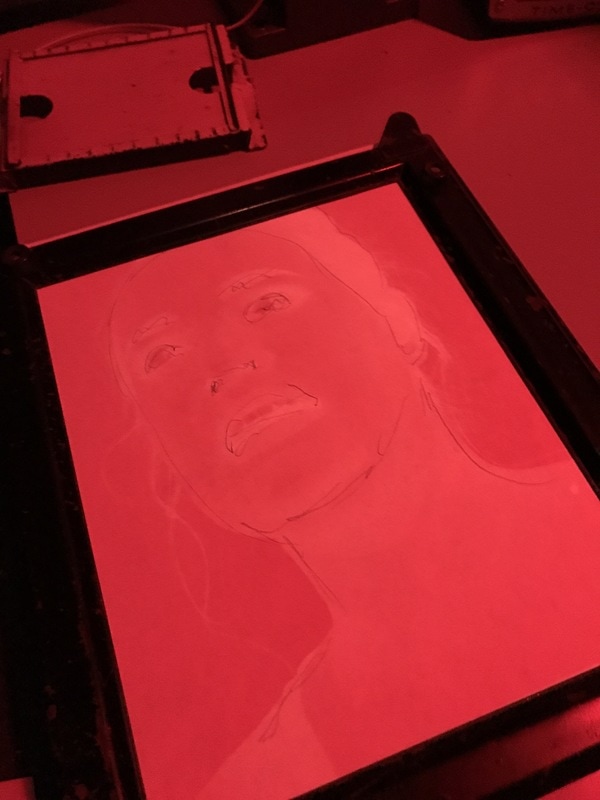
Directions Shoot portrait photos with the 35mm film camera. Team up with another person here in class and work in the photo studio (studio lights, backdrop, tripod, props, posing boards) taking at least 10 different portraits. Once the roll of film is shot it will be developed and I’ll make contact sheet of these photos. Use the contact sheet to determine which ones are the best. Make a test print of 2 of the best photos to determine best overall exposure. Remember to think of using filters to increase contrast if needed, and checking to see if dodging or burning parts are needed as well. Place your selected negative in the carrier and into the enlarger. Next, place a sheet of computer paper in the 8x10 photo frame under the enlarger. Raise the enlarger head high, filling the frame of the face on the paper. Turn the enlarger light on from the timer switch so it stays on. Open the aperture all the way open to make the light as bright as possible. Use grain focuser and focusing knob to get image into focus. Now, use a pencil or pen and make a reference drawing of the eyes, nose, mouth, and top and bottom of head. Adjust aperture down to f11 or f8 before making your test print. Try increments of 5 seconds as you make your test prints.
When you are ready to make your final prints of these 2 portraits follow steps below:
Additional Resources
https://petapixel.com/2016/05/27/fading-portraits-made-painting-developer-onto-exposures/ Examples |